“I want to easily pose the 3D character I made.” What the artist did. That’s it—let’s rely on add-ons!🧩 【Manga Tabintail Making #3】Creating a tall-eyed bipedal cat in Blender
The most challenging part this time was making the “eyeballs” movable.
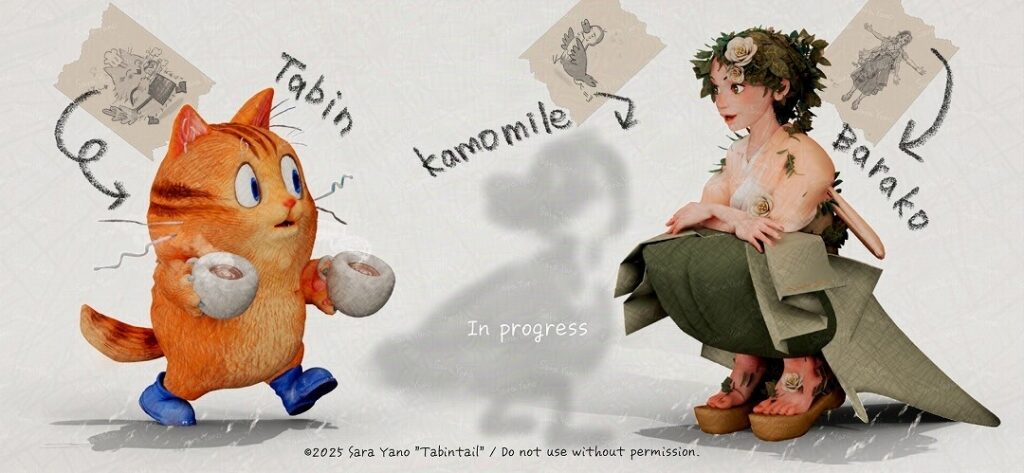
This article documents the creation of
Tabin, the tall-eyed bipedal cat, the main character of this site.
It contains a lot of technical details & is an artist’s journey while learning 3D. Please be aware.
Feel free to skip any sections you find unnecessary.
I’d be delighted if you enjoyed the images alone as part of the making-of process. 🖼️
※The main manga story I’m creating aims to be approachable and relatable! ☺
Welcome to the world of Tabintail!
I’m Sara Yano, an artist from Toyama (Japan) who loves life and creating.
I’m currently creating an original manga titled ‘Tabintail’ featuring the cat Tabin as the protagonist. I’m in the process of bringing the characters and Worldview in 3D. I’m sharing the creation process on my website and YouTube.
The theme is: “An Artist’s Quest to Create a Manga Without Burning Out.” 🎨
By using 3D software (Blender) together with illustration and manga software (CLIP STUDIO), I’m exploring ways to create manga that I can keep enjoying—without exhausting myself as an artist
- Previously.&This time…
- First, I’ll start workflow like this. Sculpting 👐
- 🕸️ I want to avoid retopology as much as possible📅💦
- UV unwrapping and mapping
for a vertically elongated eyeball🗺️ - Texture painting.
I want to layer and draw like in drawing software🎨 - Rigging too, I wanna make it easy🦴.
This time’s main focus. - Completion. Production Period and Summary
Previously.&This time…
Last time, I talked about my first attempt at 3D character creation:
the process of making the female character “Barako.”
The basic process is the same as last time,
but this time, I’ll mainly talk about
the add-ons🧩 (Blender extensions) I use,
and the troubles I encountered specifically because of the tall eyeball character design.
First, I’ll start workflow like this. Sculpting 👐
This part looks exactly the same as last time,
so I just focus on the work in silence.
Kneading digital clay… It’s just plain fun.
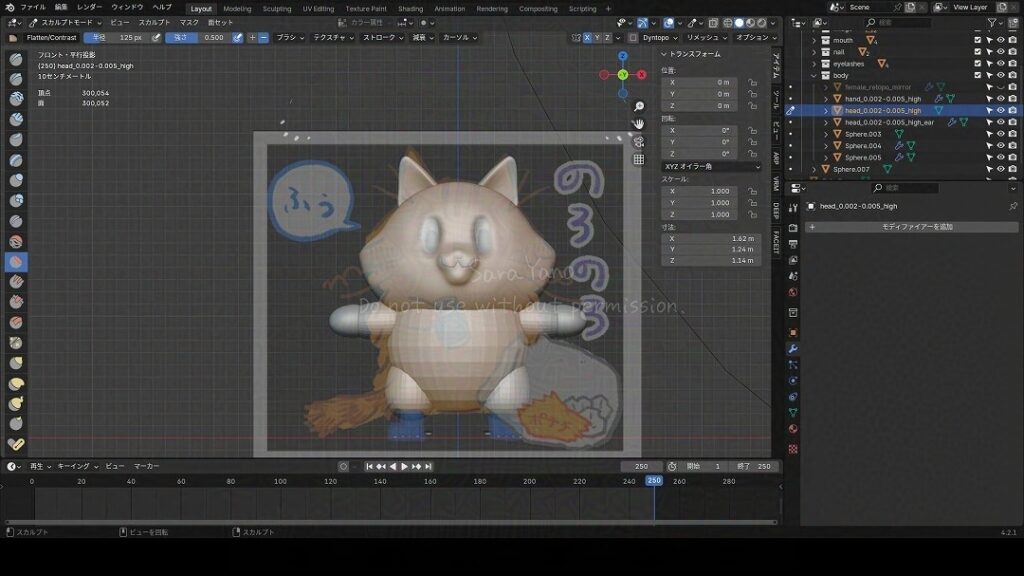
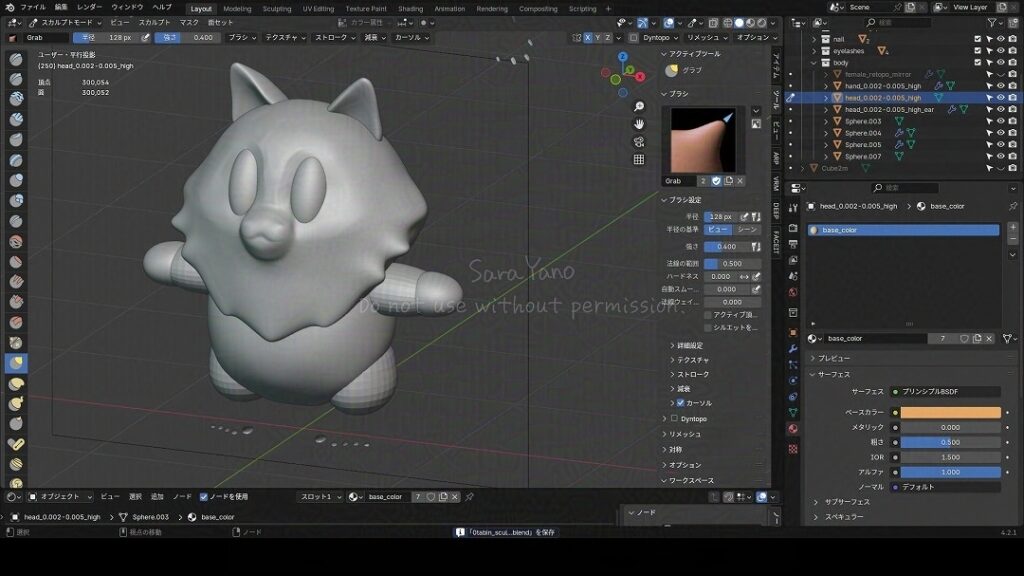
After this, we’ll refine the details.
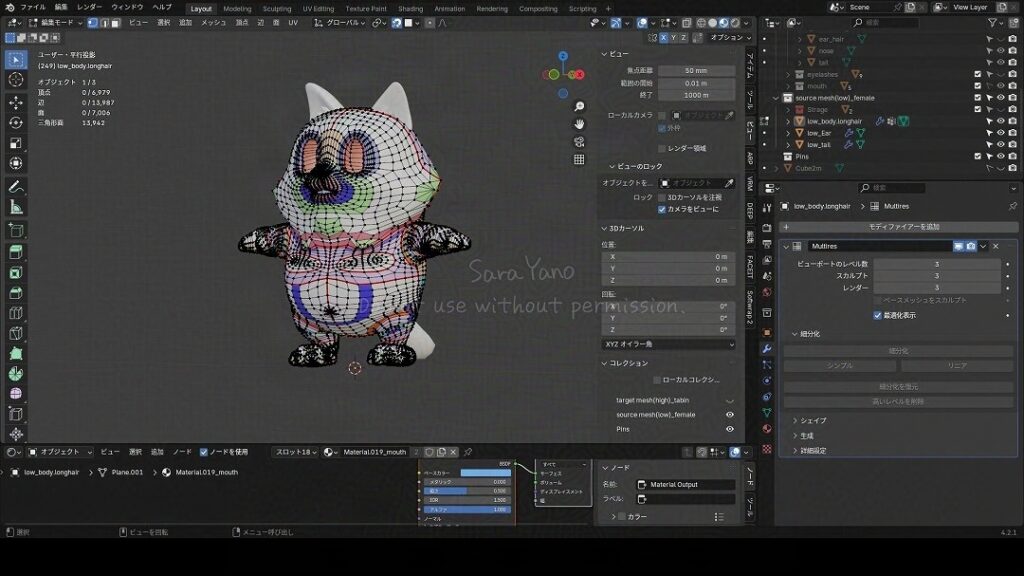
🕸️ I want to avoid retopology as much as possible📅💦
“I really don’t want to do any more retopology.”
Even if I have to do it, I at least want to reduce the time spent on it…
Purchased Softwrap🧩
Last time, retopology took me an incredibly long time,
so I decided to rely on the “Softwrap” add-on🧩.
With this, I can reuse the female-type low-poly model I painstakingly created last time.
Softwrap – Dynamics For Retopology.
Usage was referenced from the following page.
Comparing QiitaZwrap and SoftWrap – Qiita
Using the low-poly model of the female character I made last time,
I transformed it into a cat-type character.
Since the shape was quite different, I’ve been reapplying faces in various places, like the connection between the head and body.
But it was still much faster than retopologizing from scratch.
(Though I’m still far from mastering it)
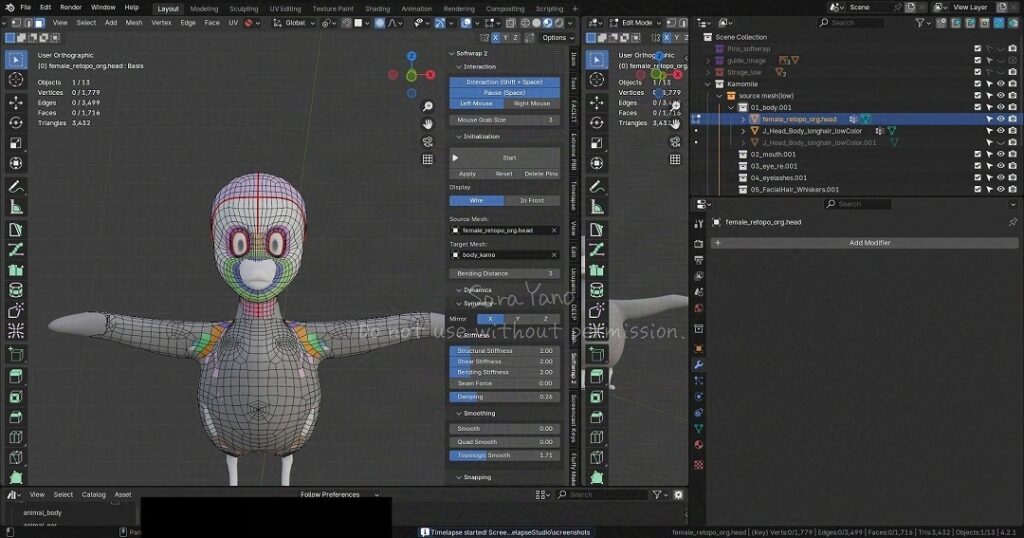
The body is already softwrapped. The head is next.
Surreal appearance…
I bought Retopoflow too🧩
After retopologizing Tabin, I wanted to make things even easier,
so I also got the retopology add-on “Retopoflow”
that I kept seeing recommended all over the web.
Thanks to the big sale…!
And it’s incredibly easy to use.
Retopoflow 4 [Beta]
Before buying, I was really torn about whether Softwrap alone would be enough…?
But I’m glad I bought both. I’m using them.
UV unwrapping and mapping
for a vertically elongated eyeball🗺️
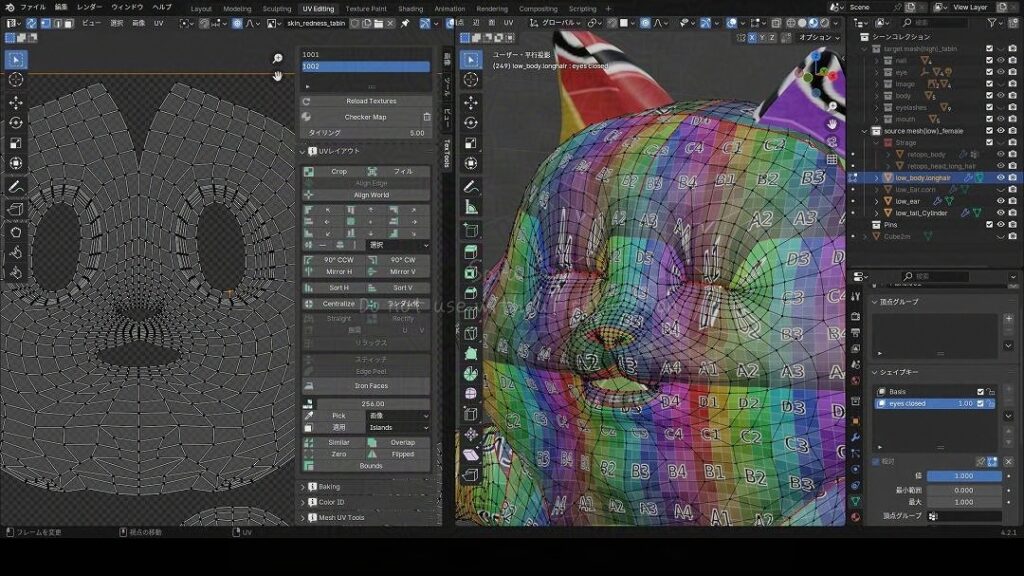
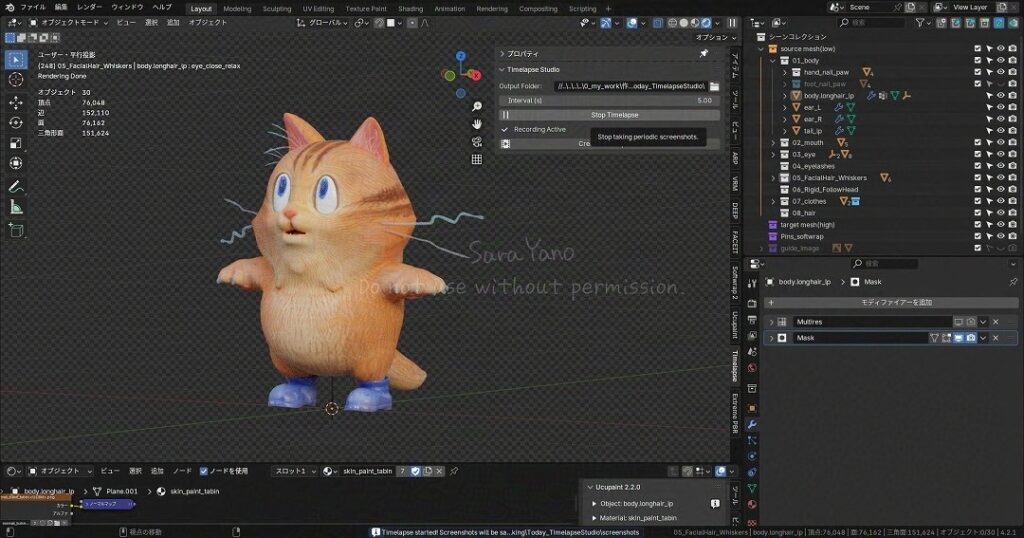
When the eyes are open, it looks fine.
However, when the eyelids close, the texture image (the image applied to the surface of the 3D model for color, pattern, and texture representation) becomes significantly distorted. The eyelids appear stretched.
This is especially noticeable on vertically elongated eyes.
To address this, I adjusted the eyelids on the UV map (left side of the image above) to appear closed, referencing this video:
↓
08 UV Mapping for Texturing – Character Creation Part 8
Texture painting.
I want to layer and draw like in drawing software🎨
I’ve been using the add-on “Ucupaint” 🧩.
(I’ve been using it since my first model creation)
It’s free? I’m so incredibly grateful.
Thanks to this, the joy of drawing in 3D has increased.
3D人-3dnchu-Ucupaint 1.2 – A Blender addon enabling texture painting, layer management, and baking!
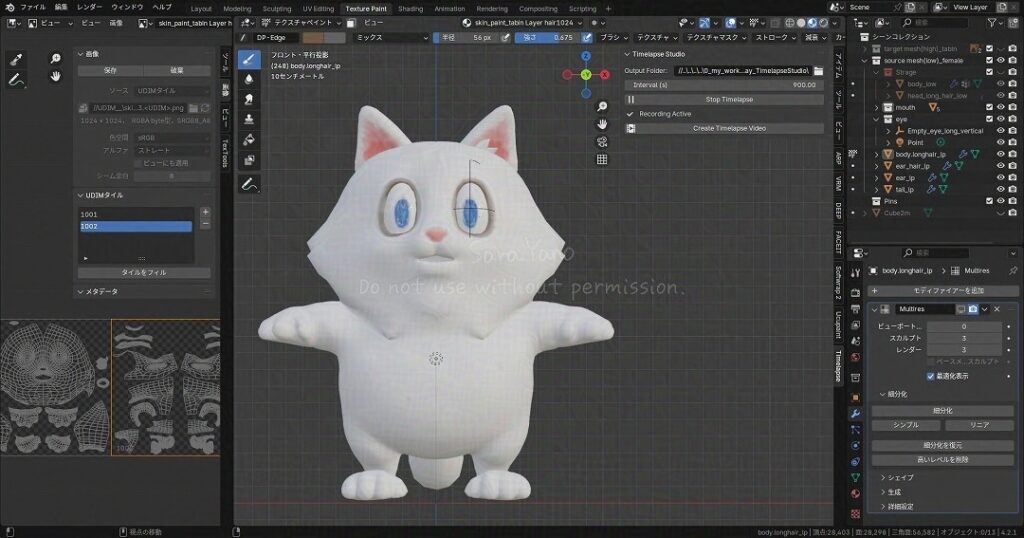
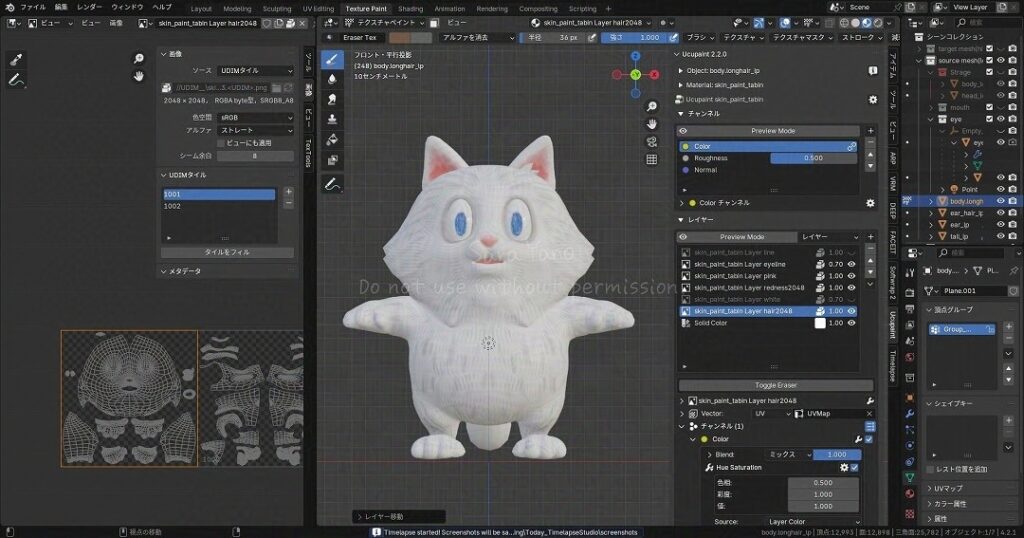
At this point, the exterior is essentially complete.
Rigging too, I wanna make it easy🦴.
This time’s main focus.
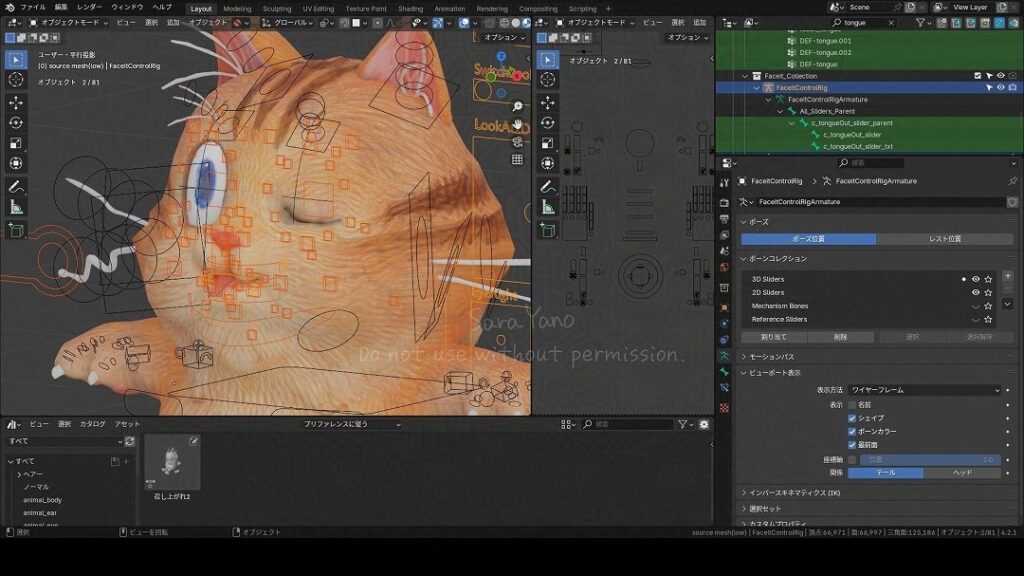
Relying on Auto-Rig Pro🧩 and Faceit🧩
The add-ons I relied on for rigging (the preparatory work of adding bones to animate a 3D character) were Auto-Rig Pro and Faceit.
As I’ll explain later,
when rigging characters with “vertically elongated eyeballs” going forward,
I haven’t linked them with either Auto-Rig Pro or Faceit.
(※This is solely based on my personal workflow)
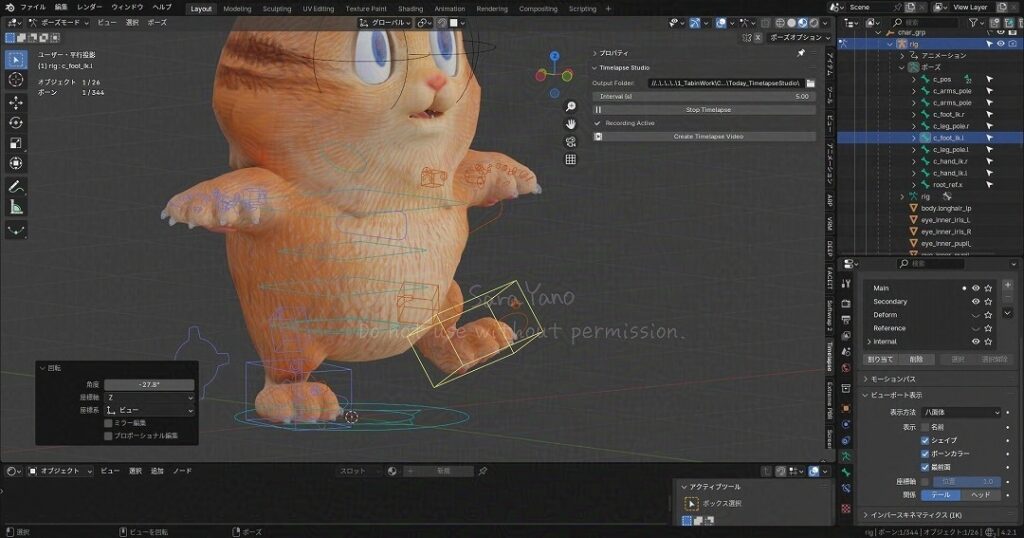
Body Rigging: Auto-Rig Pro🧩
For the settings,
I referred to this article and other videos, among various other resources. ↓
CG box: [Blender 3.2] Let’s Rig a Character Model with “Auto Rig Pro”! [Beginner’s Guide]
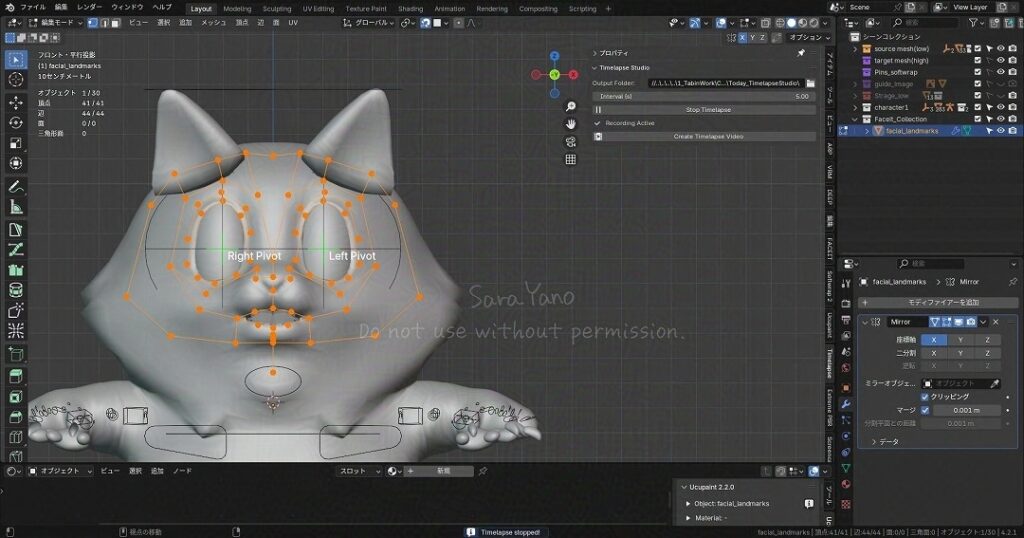
Face Rigging: Faceit🧩
Usage: I’ve relied on this site countless times.
Mystery Tech Lab: [Blender] Faceit Procedure Guide [Plugin]
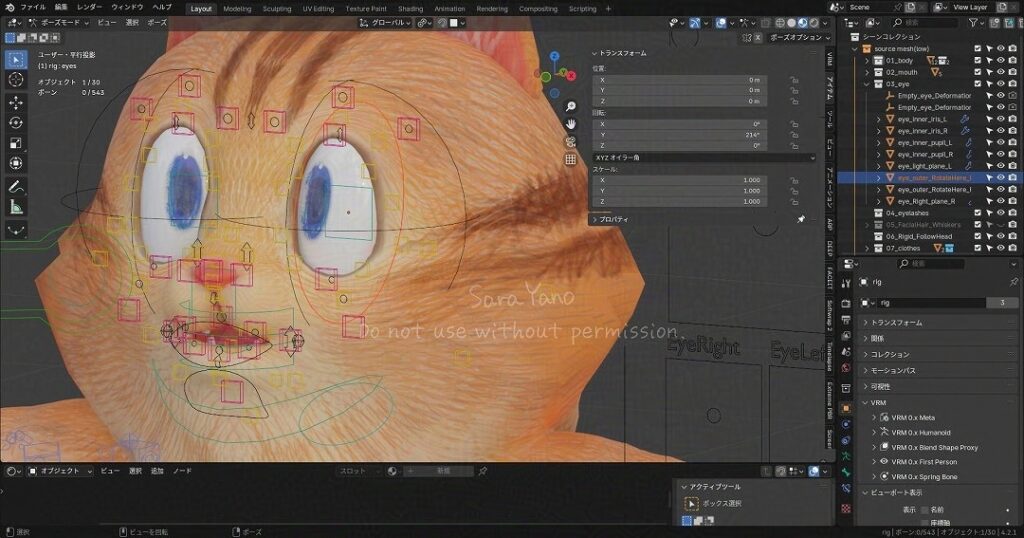
The issue of the eyeball penetrating through the eyelid.
The problem of crossed eyes. 👀
This process was quite a struggle,
so I repeatedly consulted online articles and Perplexity
while trial and erroring the process.
※ And I’ve given up on controller operation for the vertical eyes in pose mode… “Well, it’s for static manga images, so it’s probably fine…” No issues so far.
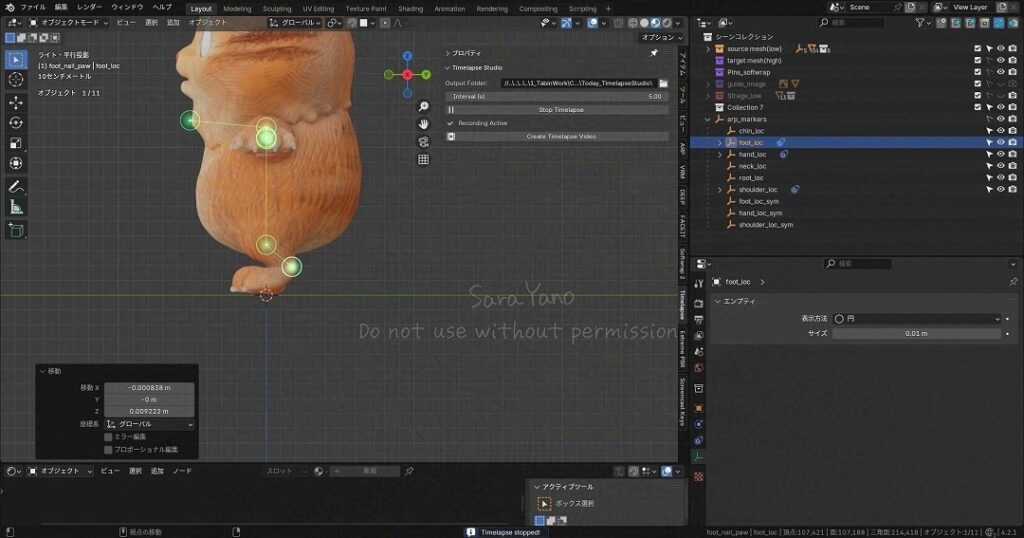
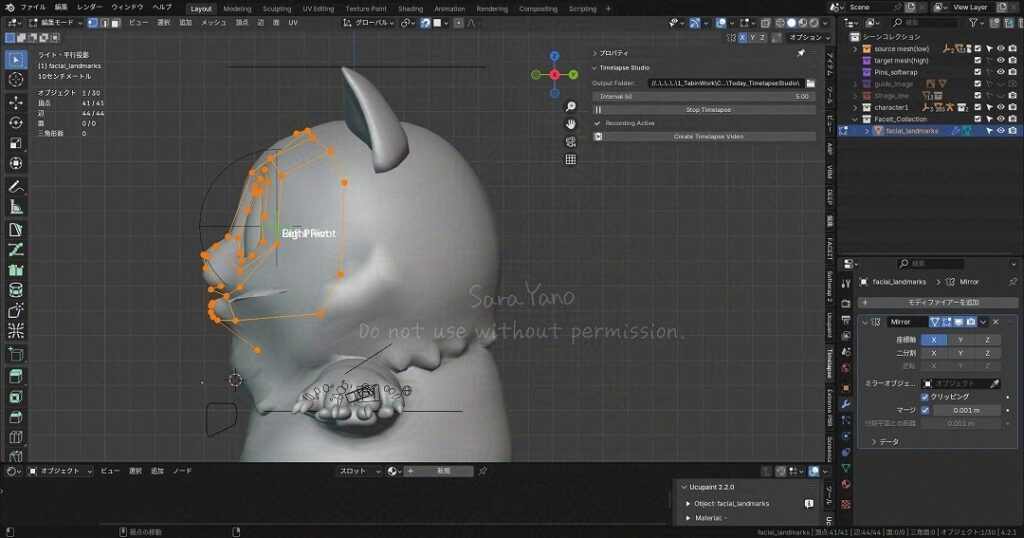
①👀Creating a vertical-shaped eyeball:
Ensure it rotates smoothly without protruding from the face.
This image is of a duck for my next work, but Tabin the cat has the same setting.
I referenced this method to create a vertically elongated eyeball. ↓
Anime CG Lab: Eye Topology Patterns in Anime 3D Models [Part 1 – Pupil]
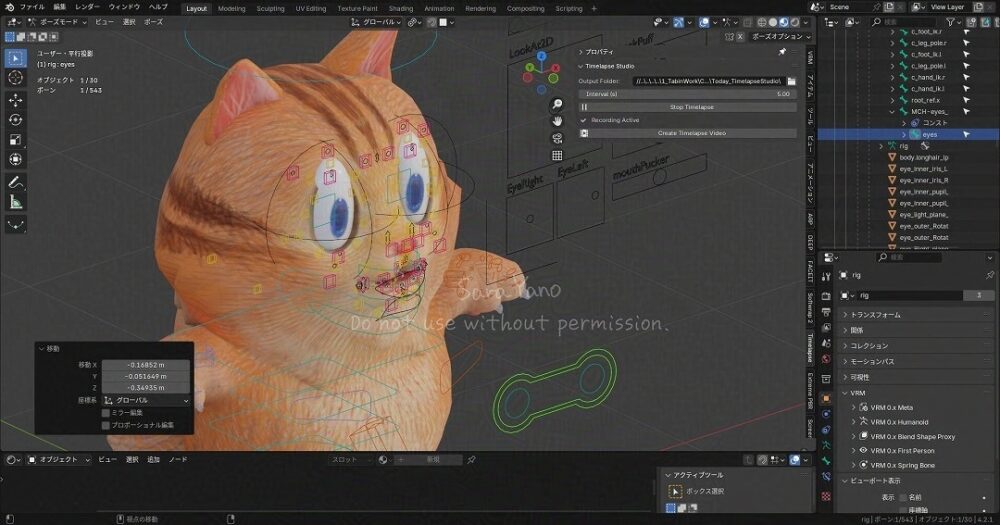
Finally,
I clicked the Item tab → Transform → “Rotation”,
I manually adjusted the X and Z axes to make the eyeball move.
② I decided not to link the vertical-shaped eyeball set
to either Autorigpro or Faceit.
(This is a personal decision. It may be possible to link them.)
Now, back to the initial issue.
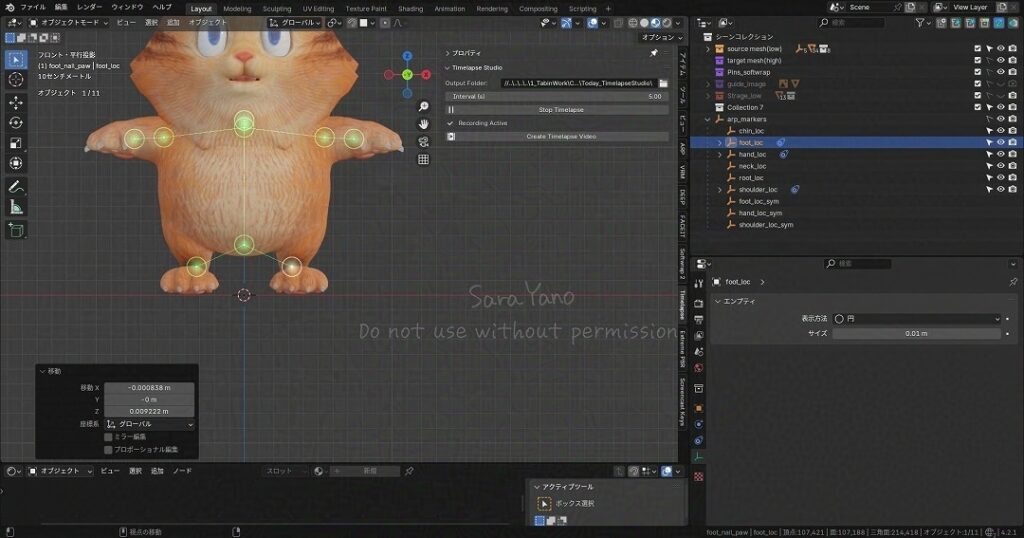
Step ① was working fine,
but… After linking with Autorigpro and then Faceit, when I checked afterward, this happened… 💦
All that effort in step ① went to waste 💦
I think Faceit has a proper setup method, but
I couldn’t quite figure out how to do it and gave up.
Therefore, the entire eyeball assembly (the empty locator and the eyeball object inside it) is kept in an independent state.
It is not linked to either AutoRigPro or Faceit.
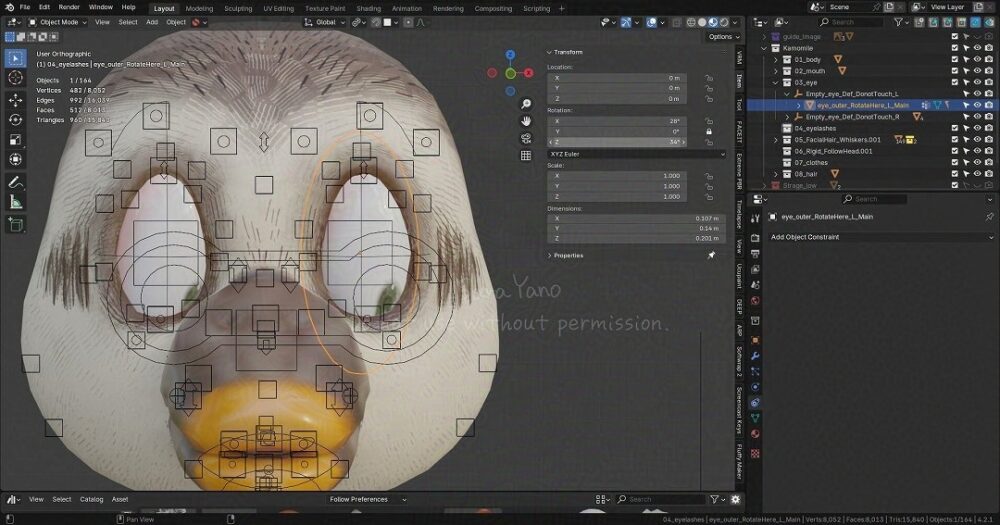
③Make the eyeball follow the head👀👨🦲:
Setting notes for using the “Child Of” constraint🔗:
【Click to OPEN】
If I leave things as they are,
only the eyeballs will be left behind in the head,
so configuration is necessary.
・Add a “Child Of” constraint
・Target: Specify the “rig” armature (ARP)
・Bone field: Specify the name of the head bone I want to follow,
such as “head” or “head.x”…
It gets messy and I panic, so…
・ Make sure to press “Set Inverse”.
Now my eyes follow my head properly.
③Synchronize right eye rotation with left eye rotation👀:
Setting notes for using the “Copy Rotation” constraint🔗:
【Click to OPEN】
Similarly, I also configured it so that operating
the left eye alone causes the right eye to move in tandem.
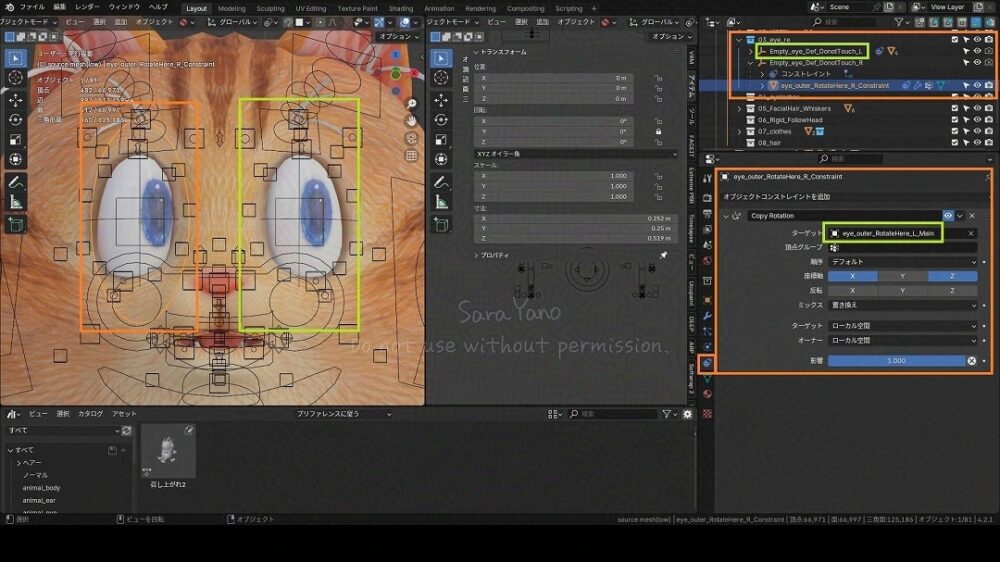
・Select the right eye object
・Add a “Copy Rotation” constraint
・Target: Specify the left eye object
・Check only the rotation axes I want to link: In my case, X and Z
・ON/OFF toggle: Influence 1.0 = ON, 0 = OFF
Now I can move my eyes exactly as I want.
When I can sense tabin’s gaze,
Tabin looks more lively. I’m so happy…!
Completion. Production Period and Summary
Tabin is complete. Feels like I made huge progress all at once.
During production 📅
My memory’s a bit fuzzy, but
I think it took about three months to complete.
Probably less than half the time of my first model, “Barako.”
(And the character I made after this took only about one to two months.
Getting faster and faster 🙌)
As my personal manual, jotted down in Notion, grew thicker,
things started to flow more smoothly.
Other tools used alongside Blender
・Information Gathering📚:
Online articles & YouTube & Blender-related books & Perplexity
Consultation on Blender operations.
Perplexity provides citations to source pages, so
I referred back to the original pages multiple times for reference.
・Personal Notes📝: Notion
Creating a personal Blender manual.
Make sure to note troubleshooting cases and their solutions.
Since it’s for my own reference,
even jotting down little things adds up to a huge amount of text.
Using toggle functions and sync blocks makes it easier
to navigate within the notes and review necessary sections.
It’s incredibly helpful.
・Recording Blender Workflow📸: OBS
Screenshots of only the work window.
Recently learned I can add notes directly to images in Explorer.
(Right-click → Properties → Details tab → Comment field)
That’s all for now—it was a pretty rough overview,
but it ended up being quite long.
Next time, we’ll make Tabin’s friend, the duck Kamomile. 🦆
制作クレジット/CREDITS
・企画・漫画ストーリー:
矢野サラ
・アートワーク(イラスト・3D・アニメーション):
矢野サラ
・アイデアサポート(思考の整理や発想の補助のための壁打ち):
Perplexity(2025~)
参考文献:『AIを使って考えるための全技術』(石井力重/ダイヤモンド社)
↑書籍掲載のプロンプトも参考にしています。
Planning, Comic Story:
Sara Yano
Artwork (Illustration, 3D & Animation):
Sara Yano
Idea Support (Idea Bouncing for Organizing Thoughts and Stimulating Creativity):
Perplexity (since 2025)
Reference:
All Techniques for Thinking with AI (Rikie Ishii / Diamond, Inc.)
Prompts published in the book were also referenced.
英語版への翻訳/Translation into English
制作スピード向上のため、以下の翻訳ツールを活用しています。
↓翻訳工程順
- 日本語原文制作:矢野サラ
- 英訳:機械翻訳(DeepL or Perplexity or Google AI Studioなど)
- 漫画作中の口調修正:機械翻訳
- 英文最終チェック:矢野サラ
※作者は現在英語学習中です。不自然な表現があればご指摘いただけますと、今後の制作に活かせるのでありがたいです。
The following translation tools are used to speed up the production process.
↓Translation process order
- Original Japanese text produced by Sara Yano
- English translation: Machine Translation
(DeepL or Perplexity or Google AI Studio,etc) - Correction of tone of voice in cartoon work: Machine Translation
- Final check of English text: Sara Yano
I am currently learning English.
I would appreciate it if you could point out any unnatural expressions so that I can make use of them in future productions.

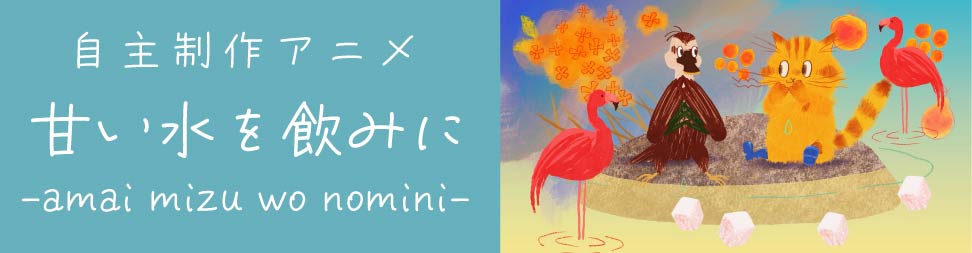
“To Drink Sweet Water” [Independent Animation]
It is a short film lasting 3-4 minutes.
update notification
I will notify you when I make a new post.
*You will receive both the Japanese and English versions. Thank you for your understanding.
↓🔔Push notifications: Receive update notifications
What are push notifications?
・🔔When this site publishes a new post,
push notifications are an automatic feature that delivers updates via your browser to any PC or smartphone
where you have granted permission to receive notifications.
・🚫📲No app installation is required.
・🕒You can receive notifications even if you do not have the site open.
・💻📱You will only receive notifications on devices (PC, smartphone, etc.) where you have given permission.
Notifications will not appear on other devices or equipment where permission has not been granted
↑Press to register. No input required.↑
Press again to cancel. You can also cancel by tapping the bell icon at the bottom of the screen.
If pressing the above button does not cause any change to the button:
Or if you press the 🔔 bell icon at the bottom of the screen
and see messages such as
“Unblock notifications” or “Notifications are blocked”:
For Android smartphones:
- Tap the menu icon (︙) at the top right of the screen
- Go to “Settings” > “Site settings” > “Notifications”
- Find this site and change the setting to “Allow”
- Reload the page 🔄
- Then tap the subscribe button again
For PC:
- Click the icon on the left side of the URL (address bar).
- Look for “Notifications” (🔔).
- If it is set to “Block,”
change it to “Allow.”
If it is not blocked, proceed to the next step. - Reload the page (🔄).
- Please press the registration button above again.
*For iPhone and iPad users: The notification registration button above is not available. Please try the following steps to receive website update notifications.
- Open this page in Safari.
- Tap the “Share” button (square with an upward arrow) at the bottom of the screen.
- Select “Add to Home Screen.”
You will receive push notifications when you open the site from the icon added to the home screen.
🔕Unsubscribe: On iPhone and iPad, you can unsubscribe by going to “Settings” → “Notifications.”
SNS, etc.
Registration and following are always welcome!

About Comments and feedback💬
・welcome!🙏
I may respond to your questions in the article, so please feel free to ask. (Please note that I may introduce your comments.)
・Comments on social media are also welcome!🙏
I would appreciate it if you could tag your posts with “#Tabintail” or the account name below.
@tabin-s.com:Bluesky
@tabin_kurashi:X・Instagram
About replying to comments
It is difficult for me to respond at the moment,
but I am carefully reading all of your comments. Thank you very much!